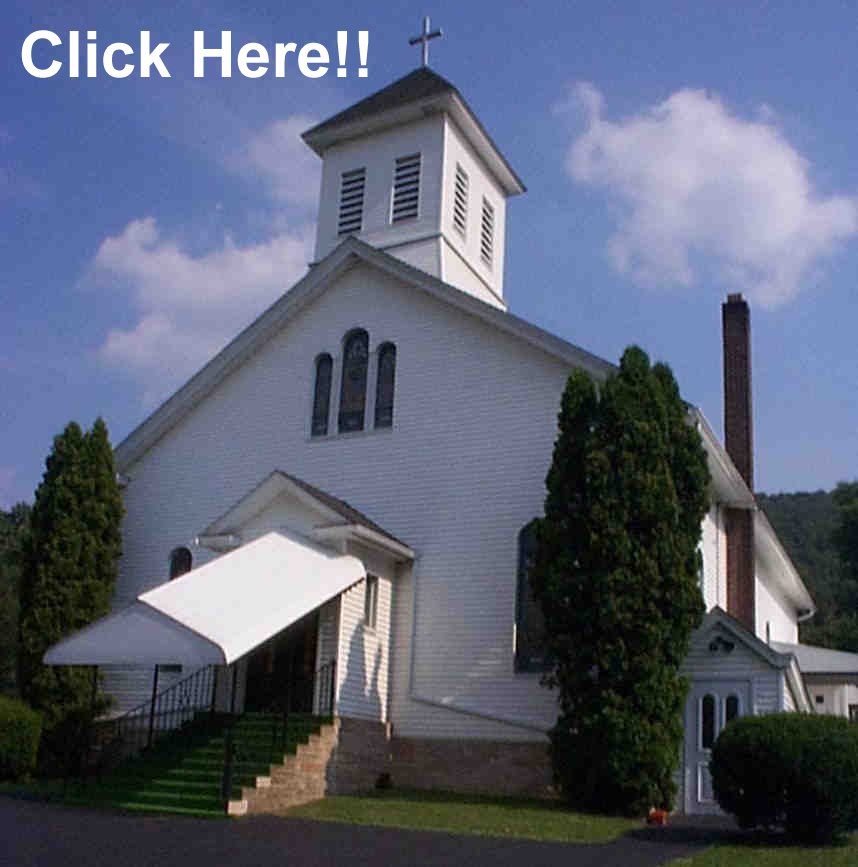
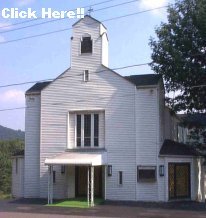
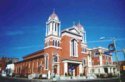
Cannabis growing techniques and cultivation methods
Menu
Written By: Daniel Gonzalez
Edited by: Anthony Anderson
Reviewed by: Donald Taylor

How To Growing Cannabis Seeds - 2025

The Art of Starting Marijuana Seeds

Commonly overlooked, the seed phase is one of the most critical stages in the cannabis plant's lifecycle. While much care is given to the developmental and reproductive phases, seed starting is where it all begins — and poor management here can jeopardize your full grow. Ensuring your seeds the best start builds the foundation for robust, resilient, and abundant plants.

Whether you're a novice grower or a skilled grower aiming to perfect your approach, this article covers the core concepts, best techniques, and advanced recommendations for Growing Cannabis Seeds.

1. Spotting in Weed Seeds

Before you start starting, it’s vital to check the quality of your seeds. Viable seeds have a improved potential of proper germination and vigorous expansion. Here's what to focus on:

  • Color: Viable cannabis seeds are usually grey, grey, or have striped markings. Whitish or ivory seeds are typically undeveloped.
  • Hardness: Softly pinch the seed between your thumb and finger. If it’s solid and doesn’t break, it's likely good.
  • Surface: Some small imperfections or tiny fissures may still allow a seed to germinate — don’t throw away it unless it's broken.

Always preserve your seeds in a moderate, dry, and shaded place until you're ready to plant. Adequate handling extends their ability and increases success rates when germinating.

2. Germination Golden Rules: Proper Setup

Before deciding on a germination method, it's essential to recognize the conditions seeds need to develop. Regardless of the approach you prefer, these crucial elements can make or break your outcome:

  • Temperature: The recommended range is 22–25°C (71–77°F). Too cool or too hot, and seeds may die.
  • Moisture: Keep your area damp, not soaked. Too much water can lead to decay or root rot.
  • Humidity: Keep relative humidity between 70% and 90% to replicate outdoor springtime setting.
  • Lighting: Use gentle fluorescent or LED lights (Cool White, code 33). Steer clear of harsh sunlight at this period.
  • Minimal Handling: Try to move the seeds as little as possible to minimize stressing the emerging taproot.
  • pH Range (Hydroponics): If growing in a hydroponic setup or plugs, maintain a pH between 5.8 and 6.2.

These “golden rules” serve as the framework for any proper sprouting routine. Consider them as the vital elements for triggering new life.

3. Growing Cannabis Seeds - Average Growth Duration

In perfect conditions, weed seeds can emerge in as little as 12 to 36 hours. However, the cycle can take up to 7 days depending on seed genetics, and conditions.

The three primary factors that activate germination are:

  • Warmth — tells that it's appropriate to sprout.
  • Moisture — triggers the biological mechanism.
  • Darkness — protects from exposure and replicates natural conditions.

Be careful. Hurrying the phase or moving the seed can cause limited root development or loss to sprout entirely.

4. Picking Your Seed Technique

There’s no single method to germination. Each grower selects a method based on experience, available tools, and setup. Below are the popular methods:

4.1. Glass of Water Method

This simple method entails placing seeds in a container of water at about 71°F. After 24–72 hours, most seeds will open and expose a small white shoot. Transfer them carefully to soil as soon as this root becomes visible.

4.2. Paper Towel Method

Put seeds between two moist paper towels, and wrap them between two saucers or inside a plastic bag to preserve wetness. Place them in a stable, shaded place. Inspect daily for emergence — usually within 1–5 days.

4.3. Direct Soil Method

Planting seeds directly into their final container reduces damage and minimizes interference. Form a 10–15mm narrow indentation in lightly watered, airy soil. Close gently, and hold moisture and warmth. Growth usually occurs within 4–10 days.

4.4. Cube or Root Cubes

Suitable for system-based setups. Soak plugs in pH-adjusted water, put seeds, and position them in a growth chamber. This method offers strong results and easy replanting.

4.5. Starter Kits

Some seed banks provide beginner-friendly kits that include plugs, a dome, fertilizer, and illumination. These are great for those who prefer a guided option with detailed instructions.

Growing Cannabis Seeds

5. When Unsure — Copy Outdoor Environment

In natural environments, cannabis seeds start growing as winter ends and spring emerges. During this shift, air temperature rise, sunlight expands, and dampness becomes more available — signaling to seeds that it's time to grow.

Try to replicate these original environment as accurately as possible:

  • Temperature: Keep a steady 22–25°C (71–77°F).
  • Humidity: Target 70–90% relative humidity.
  • Moisture: Maintain the medium wet, never oversaturated.
  • Darkness: Ensure a shaded or shaded environment during early germination.
  • Gentle light: Once the seedling sprouts, supply soft fluorescent or LED lamp from a optimal distance.

Think: “Would this feel like spring to a seed?” If the answer is affirmative, you're likely on the good way.

6. Fixing Problems: Offering Your Seeds the Best Possible Start

Light for Sprouts

Use mild fluorescent or CFL bulbs during the first few days. Keep them 10–15cm (4–6 inches) over the seedlings. As the plant grows and develops its first true leaves, you can slowly adjust the source and increase level.

Test the condition with your palm — if it's too hot for you, it's too hot for the plant.

Downward Roots

Sometimes seeds appear to grow “upside down,” but don’t stress. The root will usually reorient itself and grow downward due to natural pull. Try not to manually reposition the seed — let growth take its course.

Stuck Seed Shell

If the seedling appears with the shell stuck on top, moisten it lightly and pause. If it hasn't released naturally after 24 hours, you can slowly detach it with disinfected tweezers — only if you're confident.

Feeding Time

For soil-based setups, you typically won’t need to fertilize your seedling for the first 2–3 weeks. The soil contains enough minerals. In coco, start feeding after the first week at 25% concentration, then carefully build as new leaf sets grow.

Deficiency Symptoms

If leaves become yellow or yellow at the start, it may signal nutrient deficiency. Most commonly, nitrogen is essential during early vegetative development. Correct feeding should recover leaves to a vivid color within a 48 hours.

7. After Sprouting: Initial Seedling Maintenance

Once your seed has emerged and is upright with its first pair of initial leaves, it officially enters the early stage. This is a sensitive moment — your priority should redirect to nurturing development without strain.

  • Light schedule: 18–24 hours of consistent light daily.
  • Temperature: Keep around 22–26°C (72–78°F).
  • Humidity: Reduce slightly to 60–70% as roots spread.
  • Watering: Mist or water gently around the edges of the pot to encourage root spread.
  • Ventilation: Add air circulation to stabilize stems and avoid decay.

Once your seedling grows 3–4 nodes, you can begin low-stress training (LST), moving to a bigger pot, or transitioning to brighter grow lights — depending on your growing method.

8. Cultivation Laws

Important: Always check the hemp farming laws in your state. While many places approve home growing under recreational laws, others completely ban it. This guide is for learning purposes only and does not endorse rule-breaking.

9. Wrap-Up: Grow Confident, Grow Strong

Sprouting weed seeds is the starting — and arguably most important — step in a productive grow. By emphasizing healthy seed selection, balanced environmental conditions, and precise handling, you offer your plants the strongest possible start.

Whether you use the common paper towel method, hydro plug propagation, or high-tech starter kits, remember: attention and accuracy are crucial. Simulate nature, check conditions, and be careful.

Grow well — your future yield depends on this beginning!

Growing Cannabis Seeds - FAQ

How to start growing marijuana outdoors?

To grow marijuana outdoors from seed, initiate by starting your seeds inside in early spring. Once seedlings grow 3–4 nodes, and the outdoor temperatures stay above 15°C (59°F), move them into fertile soil with good drainage and light access. Use rich compost, water consistently, and guard your plants from insects. Flowering will initiate naturally as days shorten, typically in the warm season.

How many weeks are needed to grow cannabis from seed?

Growing cannabis from seed to harvest typically takes 10–25 weeks, depending on the type and setup. Initial phase takes 1–7 days, the seedling stage lasts 2–3 weeks, green stage can take 3–8 weeks or longer, and blooming lasts 6–10 weeks. Autoflowering strains often mature faster — in about 10–12 weeks from seed.

How to cultivate marijuana inside from seed?

To develop marijuana indoors from seed, sprout seeds using the cotton pad or plug method. Once emerged, position seedlings under 18–24 hours of illumination per day. Use good grow lights, regulate temperature (22–26°C / 72–78°F), and maintain around 60% humidity. Shift to wider pots as roots expand. When ready to flower, adjust light cycles to 12/12 hours. Observe pH, nutrients, and airflow during the grow.

How do you grow autoflowering cannabis seeds?

Fast-growing cannabis seeds develop rapidly and don’t need changes in light cycles to bloom. Germinate as usual, then provide 18–20 hours of exposure. Use light soil and minimize transplanting if possible — autos thrive being grown directly in their last pots. Use low-stress training instead of heavy techniques to boost yield during their limited life cycle (10–12 weeks).

How to plant marijuana seeds in soil?

To grow marijuana seeds in soil, first germinate your seeds or place them directly into a hydrated, airy soil mix. Ensure the soil has proper aeration and a pH between 6.0 and 6.5. Commence under mild light and progressively increase intensity. Preserve the top layer hydrated and avoid overwatering. As the seedling matures, give nutrients according to the plant’s period and observe soil conditions regularly.